Plotter blades: Setup of the blade holder. |
GIS Premium Blades |
|
Setting the blade holder of drag blade plotters |
||
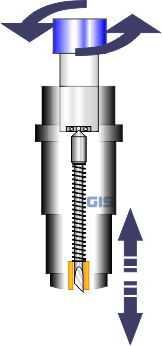 |
Unlike milling machines, cutting plotters do
not have a z-axis that can be variably controlled in height. They
only know the states "Move without cutting" ("Pen Up") or "Cut"
("Pen Down"). |
|
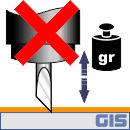
Adjusting the extension length of the blade |
|||
 |
 |
 |
 |
| The blade protrudes too far from the holder. An attempt was made to regulate the cutting depth by means of contact pressure. This normally does not work. The blade holder should touch the foil. | The blade does not protrude far enough from the blade holder. The material is not cut completely. | This setting is correct: The blade should just scratch the backing material (silicon paper) a little. | The blade protrudes too far from the blade holder: By cutting the carrier material, paper fibres stick to the adhesive during weeding or the carrier material is completely cut through or it is cut into the table or into the cutting bar. |
|
GIS Gienger Industrie-Service GmbH
• Max-Eyth-Str. 14 • D - 78194 Immendingen Tel. +49-(0)7461-1620 20 • Fax. +49-(0)7461-1620 21 • |
|||
| |